MDDHosting ObjectCache – Memcached and Redis Manager Updated

MDDHosting ObjectCache Memcached and Redis Manager

We are thrilled to announce the latest updates to our Object Cache cPanel Plugin that will help you manage Memcached and Redis more efficiently. We made management of these services even more straightforward and user-friendly.

Here’s a quick rundown of the new features:

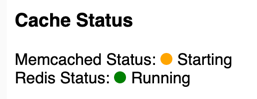
Status Indicator: The status of the plugin is now indicated with a colored circle – green for running, yellow for starting or stopping, and red for stopped. This change will help you quickly identify the status of the plugin at a glance, without the need to check logs or other indicators.

Refresh Status Button: We have updated the “Refresh Status” link to a blue button. This change makes it more apparent that this button refreshes the status of the plugin and enables you to check for updates quickly.

Enable/Disable Button: The Enable/Disable links have been converted to buttons that are green for Enable and red for Disable. This change makes it more intuitive to turn on or off the plugin, and it also makes it easier to identify the current status. We debated between green to start, or green to show it’s already running on the buttons – let us know your thoughts!

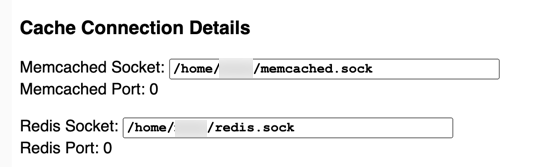
Improved Text Display: We have made the text boxes for the socket display in a monospace font and bold. This change makes it easier to read.

Live Start/Stop Timer: We added a live timer until the next start/stop process for Memcached and Redis. The timer provides real-time information on when the services will start or stop next. This is especially useful when you need to make sure that the services are up and running before you begin working.

These updates are now live and available for use. We believe that these improvements will help our users manage Memcached and Redis more efficiently, saving them time and effort. If you have any feedback or suggestions, we’d love to hear from you!

Configuring W3 Total Cache, W3TC, for Optimum Performance with Disk Cache for Shared Hosting – Optimizing WordPress

WordPress LogoIn this article I will be explaining how to configure W3 Total Cache, hereafter referred to as ‘W3TC’, to cache your site and to serve that cache statically via mod_rewrite for maximum performance.

You will need to install W3TC via your “wp-admin” -> “Plugins” -> “Add New” if it is not already installed.  One the installation is complete you will want to activate the plugin.  Once activated you can click on “Performance” in the left navigation of your “wp-admin”.  This will drop you at a dashboard where W3TC is trying to sell all kinds of upgrades.  I will not be discussing those upgrades in this article.

Continue reading “Configuring W3 Total Cache, W3TC, for Optimum Performance with Disk Cache for Shared Hosting – Optimizing WordPress”

Configuring WP Super Cache for Optimum Performance – Optimizing WordPress

WordPress LogoIn this article I will explain how to optimize your WordPress Super Cache to use mod_rewrite to serve your cache files fast and efficiently.  The installation defaults are not ideal and will only help with the most resource-intensive sites.  When optimized properly WP Super Cache can greatly increase visitor concurrency as well as reduce your bounce rate.

We have users running WordPress on shared hosting and getting anywhere from 3,000 to 10,000 unique visitors per day without issues while we have other customers that seem to struggle to handle more than a few concurrent users at once – both on the same type of plan!  The difference between the two comes down to optimization.

One of the most important things you can do to increase the performance and reduce the resource usage of WordPress is to install and properly configure a caching plugin.  The plugins we see most often are WP Super Cache ans W3 Total Cache.  In this article I’m going to be discussing WP Super Cache.

Continue reading “Configuring WP Super Cache for Optimum Performance – Optimizing WordPress”